

D) Install and Configure an SEO Plugin (WordPress)

Search Engine Optimization (SEO) is critical for the success of any website. SEO helps you improve your website’s visibility and rank higher in search engine results pages (SERPs). One of the easiest ways to improve your website’s SEO is by using an SEO plugin on your WordPress website.
In this chapter, I will guide you through the process of installing and configuring an SEO plugin on your WordPress website.
Why is an SEO Plugin Important for Your Website?
An SEO plugin is a tool that helps you optimize your website’s content and structure for better search engine rankings. An SEO plugin can help you:
- Optimize your website’s meta tags, title tags, and descriptions
- Optimize your website’s content for specific keywords
- Generate XML sitemaps for your website
- Improve your website’s loading speed
- Optimize your website’s images for better rankings
- Analyze your website’s performance and identify areas for improvement
Best SEO Plugins for WordPress
WordPress offers a range of SEO plugins, but not all are created equal. Some of the best SEO plugins for WordPress include:
Yoast SEO: One of the most popular SEO plugins for WordPress, Yoast SEO offers a range of features including content analysis, XML sitemap generation, and social media integration.
All in One SEO Pack: Another popular SEO plugin, All in One SEO Pack offers features such as XML sitemap generation, social media integration, and Google Analytics support.
Rank Math: A newer SEO plugin, Rank Math offers a range of advanced features including keyword tracking, schema markup, and redirection management.
How to Install an SEO Plugin on Your WordPress Website?
Installing an SEO plugin on your WordPress website is easy. Follow these steps:
- Login to your WordPress website’s dashboard.
- Click on Plugins > Add New.
- In the search bar, type the name of the SEO plugin you want to install (e.g., Yoast SEO).
- Click on Install Now, and then click on Activate.
Congratulations! You have successfully installed an SEO plugin on your WordPress website.
How to Configure an SEO Plugin on Your WordPress Website?
Configuring an SEO plugin on your WordPress website is critical to ensuring it works effectively. Follow these steps:
- Login to your WordPress website’s dashboard.
- Click on the SEO plugin you have installed.
- Follow the instructions provided by the plugin to configure it.
- Configure the meta tags, title tags, and descriptions for your website’s pages and posts.
- Configure XML sitemaps for your website.
- Configure social media integration and Google Analytics support.
Some FAQs on Installing and Configuring an SEO Plugin
- Do I need an SEO plugin if I am already using Google Analytics?
Yes. While Google Analytics provides you with valuable insights into your website’s performance, it does not help you optimize your website’s content and structure for better search engine rankings.
- How many SEO plugins should I install on my WordPress website?
We recommend installing only one SEO plugin on your WordPress website to avoid conflicts and errors.
E) Generate and Submit a Sitemap

Generating and submitting a sitemap to search engines is an essential step in improving your website’s visibility and search engine rankings. Here’s how you can generate and submit a sitemap to different search engines:
Generate a Sitemap: First, generate a sitemap for your website using a sitemap generator tool or a Yoast plugin. A sitemap is a file that lists all the pages on your website and helps search engines crawl and index your website’s content.
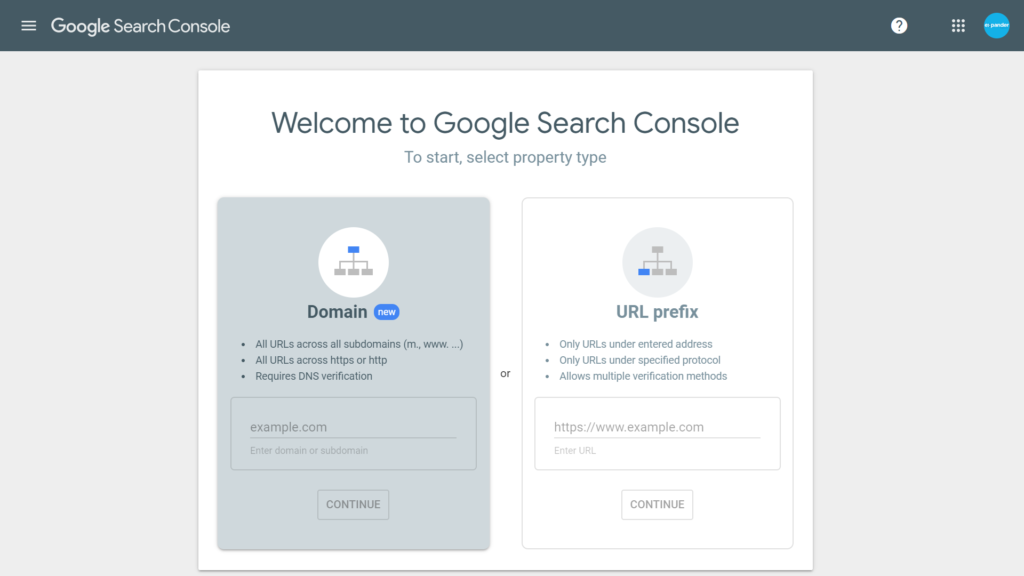
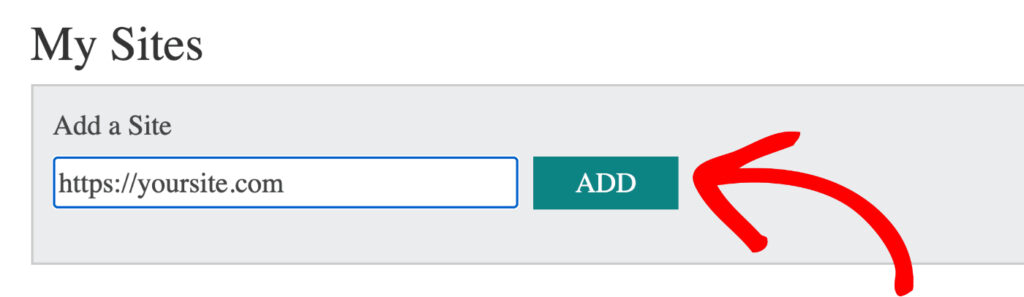
Submit Sitemap to Google Search Console: Once you have generated your sitemap, submit it to Google Search Console. Sign in to your Google Search Console account, select your website, and click on “Sitemaps” under the “Index” section. Enter the URL of your sitemap and click “Submit.”
Submit Sitemap to Bing Webmaster Tools: In addition to Google, submit your sitemap to Bing Webmaster Tools. Sign in to your Bing Webmaster Tools account, select your website, and click on “Configure My Site” and then “Sitemaps.” Enter the URL of your sitemap and click “Submit.”
Submit Sitemap to Yahoo Search: Yahoo Search also supports sitemap submission. Sign in to your Yahoo Search account, select your website, and click on “Sitemaps” under the “Site Explorer” section. Enter the URL of your sitemap and click “Submit.”
Submit Sitemap to Yandex Webmaster: If you want to submit your sitemap to Yandex, sign in to your Yandex Webmaster account, select your website, and click on “Indexing Options” and then “Sitemap files.” Enter the URL of your sitemap and click “Add.”
By generating and submitting a sitemap to different search engines, you can help search engines crawl and index your website’s content more effectively. Remember to update your sitemap regularly as you add or remove pages from your website.
F) Create a Robot.txt file
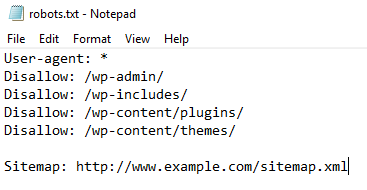
Creating a robots.txt file is an essential step in ensuring that search engines can effectively crawl and index your website’s content. Here’s how you can create a robots.txt file:
Open a Text Editor: First, open a text editor such as Notepad or TextEdit.
Create a New File: Create a new file and save it as “robots.txt” in the root directory of your website.
Add User-agent and Disallow Directives: In the robots.txt file, add “User-agent” directives followed by the name of the search engine’s crawler you want to control, such as “Googlebot” or “Bingbot.” Then, add “Disallow” directives followed by the pages or directories you want to block search engines from crawling, separated by a comma. For example, to block search engines from crawling a directory named “private,” you would add the following line:
User-agent: * Disallow: /private/
- Add Allow Directives: If you want to allow search engines to crawl specific pages or directories, you can add “Allow” directives followed by the pages or directories you want to allow, separated by a comma. For example, to allow search engines to crawl a directory named “public,” you would add the following line:
User-agent: * Disallow: Allow: /public/
- Test and Upload the File: Once you have created your robots.txt file, test it using the Google Search Console robots.txt Tester tool. If everything looks good, upload the file to the root directory of your website using an FTP client or the file manager provided by your hosting provider.
By creating a robots.txt file, you can control which pages and directories search engines can crawl and index on your website. Remember to regularly update your robots.txt file as you add or remove pages from your website.
G) Check Search Console for Manual Actions
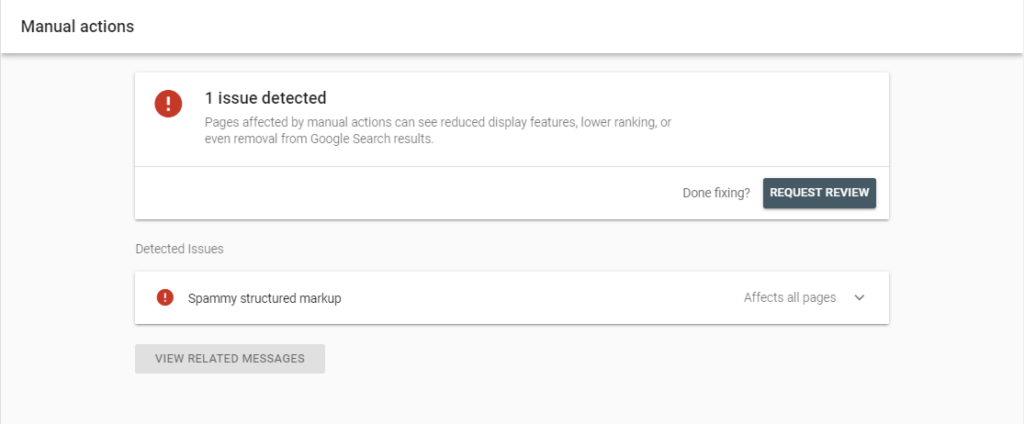
Checking your website’s Search Console for manual actions is an important step in maintaining your website’s search engine visibility and rankings. Here’s how you can check for manual actions:
Sign in to Google Search Console: First, sign in to your Google Search Console account and select the website you want to check for manual actions.
Go to Manual Actions: Under the “Security & Manual Actions” section, click on “Manual Actions.”
Check for Manual Actions: If there are any manual actions taken against your website, they will be displayed in this section. Common manual actions include “Pure Spam,” “Spammy Structured Mark-up,” and “User-generated Spam.”
Resolve Manual Actions: If your website has been flagged for manual actions, it’s important to resolve them as soon as possible. Click on the “Learn More” link next to the manual action to learn more about what caused it and how to fix it. Once you have fixed the issue, click on the “Request Review” button to request a review from Google. Google will then review your website and remove the manual action if the issue has been resolved.
Keep an Eye on Manual Actions: It’s important to regularly check for manual actions in your Search Console and resolve them promptly to avoid any negative impact on your website’s search engine visibility and rankings.
By regularly checking for manual actions in your Search Console and resolving them promptly, you can maintain your website’s search engine visibility and rankings. Remember to also follow Google’s Webmaster Guidelines to avoid any future manual actions.
H) Make Sure That your Website is Index
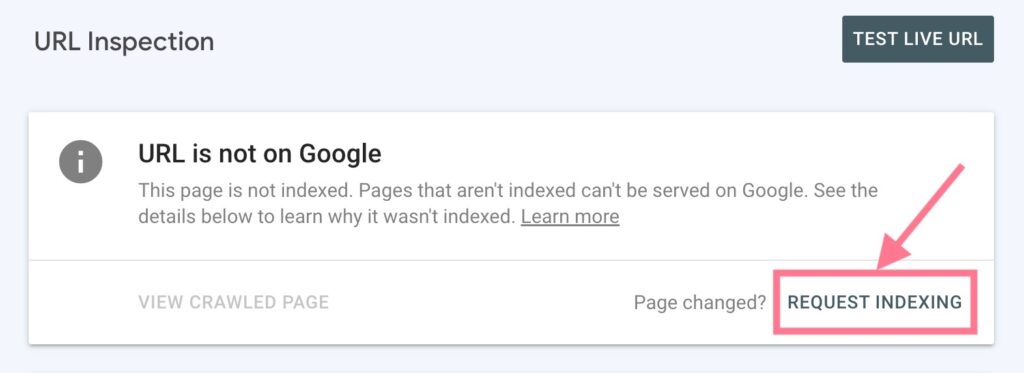
Ensuring that your website is properly indexed by search engines is essential to maximizing your website’s visibility and traffic. Here are some steps you can take to make sure that your website is indexed:
Use the Google Search Console: Sign up for a Google Search Console account and add your website. The Search Console will provide you with important information about your website’s indexing status.
Submit a Sitemap: Create and submit a sitemap of your website to the Search Console. This will help search engines find and crawl all of your website’s pages.
Check for Indexing Errors: In the Search Console, check for any indexing errors that may be preventing search engines from indexing your website. Common indexing errors include server errors, redirect errors, and URL errors.
Use Internal Linking: Ensure that your website’s pages are properly linked to each other. This will help search engines find and index all of your website’s pages.
Share your Website on Social Media: Share your website on social media platforms to increase its visibility and attract more visitors. This will also help search engines find and index your website.
Use Relevant Keywords: Use relevant and descriptive keywords throughout your website’s content. This will help search engines understand what your website is about and index it appropriately.
By taking these steps, you can ensure that your website is properly indexed by search engines and maximize its visibility and traffic. Remember to regularly monitor your website’s indexing status in the Search Console and make any necessary adjustments to improve its performance.